By Yolan
 I think it was a quiet fall morning when I caught a whiff of something in the air. The distinct moooing betrayed the identify of the trespassers. The cows again. Sigh. They don't generally cause any problems and many times they leave behind some really good fertilizer, but this morning was different. At any rate, uninvited company or not, we all hopped in the car and headed off to church.
We wouldn't learn of their dastardly deeds until a day or two later. Meena had some solar panels laying out unprotected on her parcel (see Ally's article about this off grid no-no here) and they subsequently made a foot path out of those. You can imagine the outcome. We helped Meena clean up the mess.
Some rural areas have open-range policies which basically mean that cattle can roam freely, and if you don't want them on your property, it's your responsiblity to fence them out. We had discussed fencing the property several times but it just seemed like too daunting of a task and we had so many other things to tend to.
Well we quickly learned that trying to garden in unprotected territory is an exercise in futility. We had to do something. Solar panels and trees aren't cheap and we could not afford to continue having the wildlife destroying these things. It was time to build .... a fence. Not just any fence mind you. We decided to fence the entire property ... all 40 acres of it.
This is how we did it ...
Step #1: Clear the Fence Path
So we have a lot of brush ... a lot. Before we could put the fence in place, we had to clear that out. This was not a task for the faint of heart. This was the textbook definition of "Hard Work". Add to that the fact that we did not have a good chainsaw. I gave one to Ally as a birthday present one year but unfortunately, even though it had good reviews, it never held up well. Meena and Ally also had purse-sized ones that had the same issue. So we were quite literally cutting down small trees with a sawzall. It got the job done but much slower lol. Meena's mom sometimes helped out. We were pretty much able to get this all done with a machete, shears, a pickax, a rake, and the sawzall.
![Overgrown Brush Overgrown Brush]()

PRO TIP: If you need to install a lot of fencing, do it in the cooler months. It's a brutal job in the summer heat.
Step #2: Get the T-Posts into the ground
We decided that we wanted to put up field fencing instead of the customary barbed-wire fence. This is because the field fencing would keep more things out whereas the barbed-wire would mainly just keep out the cows. We had to get over 400 t-posts into the ground. Did I mention that our soil is rocky? You can envision how fun this job was going to be.
So we started out with a tool called the Man-Saver. Some friends from church allowed us to borrow theirs. This was very gracious of them because these are not cheap. I must say, this is indeed a great tool. You have to connect it to an air compressor and when it gets going, you really don't have to do much at all. The sad part is that we were never able to get it to work well for us. It wasn't the tool seeing that it has many positive reviews, but more the operators. We didn't quite know what we were doing to be honest. We came to the conclusion that it didn't work for us because we're women and its a man-saver. We clearly needed a woman-saver which has yet to be invented. Soooo ... what option was left? The good ole-fashioned t-post pounder.
![Mansaver Mansaver]()
![Pounding a t-post Pounding a t-post]()
We pounded over 400 t-posts into the ground. Manually. There were a couple of occassions where we missed the t-post and whacked ourselves in the head, so there was literal blood shed during this project. But like they say, what doesn't kill you makes you stronger.
To make things a bit easier, we used a Milwaukee SDS drill with an 18 inch bit to dig down and start a hole in the ground. Then we put the t-post into that hole and took turns pounding. It was great exercise and since it was cool outside (we did this in the fall and winter) it wasn't too bad. Just a lot of work.
![Milwaukee SDS Drill Milwaukee SDS Drill]()
We also laid a guideline down so that we could set the posts in somewhat of a straight line. For some of the corner posts, we used round wooden beams but we really should've gotten the next size up because they're not that thick and the corner posts should be very strong. So, in addition to concreting those in, we put t-posts in front of them for extra strength. Prayerfully, these will hold up over time. For the other corners, instead of using wooden beams, we braced the t-posts with other t-posts on each side set at an angle and tied together with wire.
![Guideline for t-posts Guideline for t-posts]()
![Wooden corner post Wooden corner post]()
![Braced corner t-posts Braced corner t-posts]()
So we started out with a tool called the Man-Saver. Some friends from church allowed us to borrow theirs. This was very gracious of them because these are not cheap. I must say, this is indeed a great tool. You have to connect it to an air compressor and when it gets going, you really don't have to do much at all. The sad part is that we were never able to get it to work well for us. It wasn't the tool seeing that it has many positive reviews, but more the operators. We didn't quite know what we were doing to be honest. We came to the conclusion that it didn't work for us because we're women and its a man-saver. We clearly needed a woman-saver which has yet to be invented. Soooo ... what option was left? The good ole-fashioned t-post pounder.
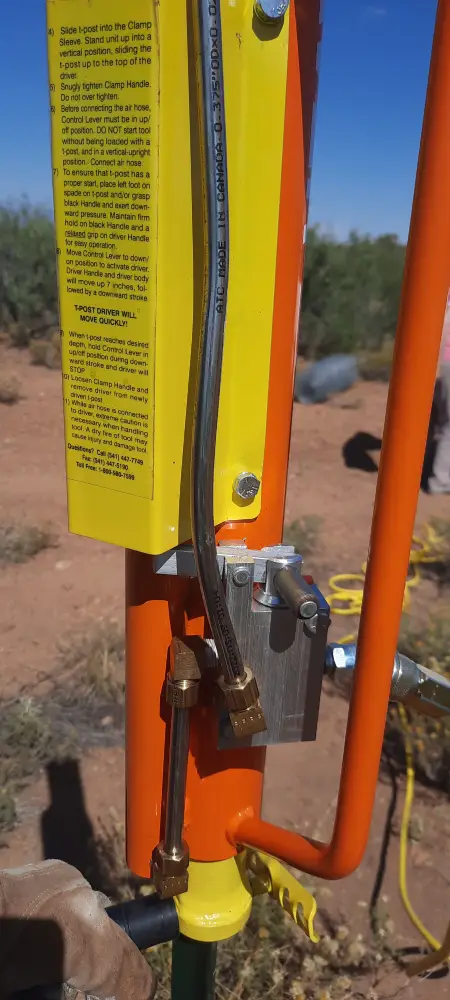

We pounded over 400 t-posts into the ground. Manually. There were a couple of occassions where we missed the t-post and whacked ourselves in the head, so there was literal blood shed during this project. But like they say, what doesn't kill you makes you stronger.
To make things a bit easier, we used a Milwaukee SDS drill with an 18 inch bit to dig down and start a hole in the ground. Then we put the t-post into that hole and took turns pounding. It was great exercise and since it was cool outside (we did this in the fall and winter) it wasn't too bad. Just a lot of work.
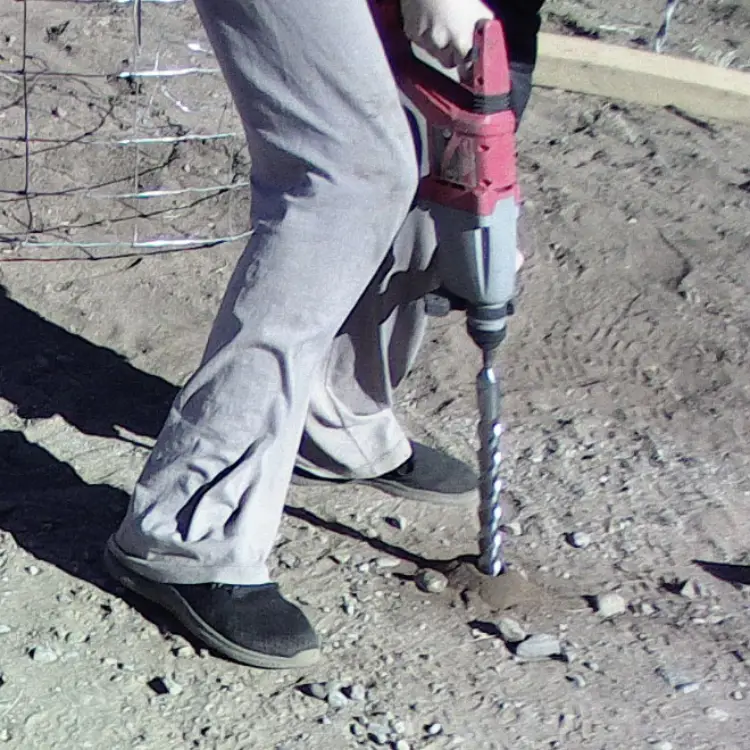
We also laid a guideline down so that we could set the posts in somewhat of a straight line. For some of the corner posts, we used round wooden beams but we really should've gotten the next size up because they're not that thick and the corner posts should be very strong. So, in addition to concreting those in, we put t-posts in front of them for extra strength. Prayerfully, these will hold up over time. For the other corners, instead of using wooden beams, we braced the t-posts with other t-posts on each side set at an angle and tied together with wire.
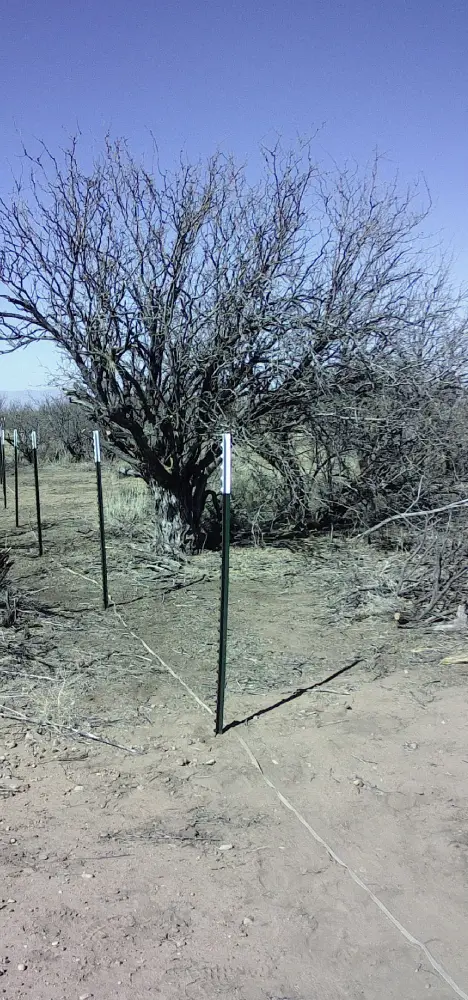


Step #3: Unroll the fencing
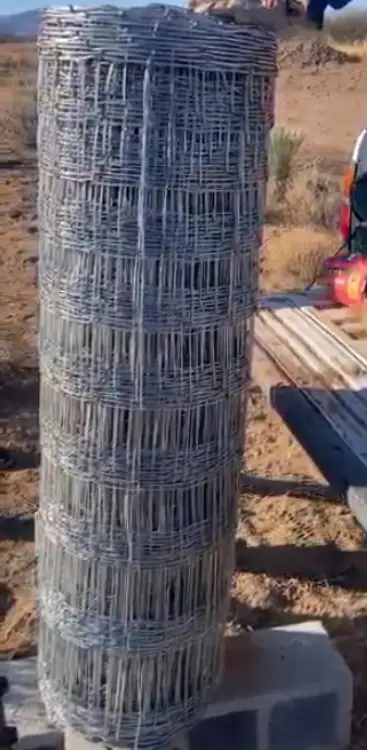
To save money, we bought fence rolls that were 330ft long. The ones we purchased were being discontinued and we got a discount on them. We bought 16 rolls of this. Soooo, yeah ... these were heavy. Imagine unrolling them. Some of our early attempts at this were comical to say the least. We were laughing at ourselves.
After some trial and error, frustration, and finally prayer we tried a new approach. Basically we ran some 1 1/2 in PVC pipe through the roll, suspended it on cinder blocks, connected it to the hitch on the truck, and drove off. This was by far, the quickest and easiest method to do this. You can see it demonstrated in the video below. It helps that we live in what some would call, "the middle of nowhere" thus we didn't have to worry much about traffic while doing this in the road:
After some trial and error, frustration, and finally prayer we tried a new approach. Basically we ran some 1 1/2 in PVC pipe through the roll, suspended it on cinder blocks, connected it to the hitch on the truck, and drove off. This was by far, the quickest and easiest method to do this. You can see it demonstrated in the video below. It helps that we live in what some would call, "the middle of nowhere" thus we didn't have to worry much about traffic while doing this in the road:
Step #4: Attach the fencing to the t-posts
How difficult do you imagine it would be to attach 300 feet of fencing to t-posts? Well I can tell you, it was a mess. We got the fencing tangled and had a beast of a time getting it pulled out along the t-posts to attach it. Again, we had to pray for wisdom. And ... God answered. Who knows, He may have gotten a chuckle or two out of our predicament because we were really a hot mess out there, lol. It makes me chuckle just thinking about it.
Instead of trying to attach all 330 feet at once, we wound up cutting it into three 110ft pieces and attaching those. Wow! What a difference! That was so much more manageable than what we were attempting before! God is merciful :-)
![Large roll of field fencing Large roll of field fencing]()
![Multiple cut rolls of field fencing Multiple cut rolls of field fencing]()
In attaching the fencing, we also had to stretch it to make sure that it didn't sag. So we used a fence stretcher (another friend from church let us borrow one). We used that along with a come-along and the hitch on the truck to do the stretching. It was a bit tough in some spots because the field fencing would sometimes get caught on small roots that were sticking up out the ground. But finally, we got it all done.
Thankfully our neighbors allowed us to hang our fencing on the one stretch of land where our properties meet. They already had poles up for their fencing so that saved us some time and money for sure.
![Fence stretcher Fence stretcher]()
![Fence stretcher Fence stretcher]()
Instead of trying to attach all 330 feet at once, we wound up cutting it into three 110ft pieces and attaching those. Wow! What a difference! That was so much more manageable than what we were attempting before! God is merciful :-)

In attaching the fencing, we also had to stretch it to make sure that it didn't sag. So we used a fence stretcher (another friend from church let us borrow one). We used that along with a come-along and the hitch on the truck to do the stretching. It was a bit tough in some spots because the field fencing would sometimes get caught on small roots that were sticking up out the ground. But finally, we got it all done.
Thankfully our neighbors allowed us to hang our fencing on the one stretch of land where our properties meet. They already had poles up for their fencing so that saved us some time and money for sure.
Step #5: Hang gates
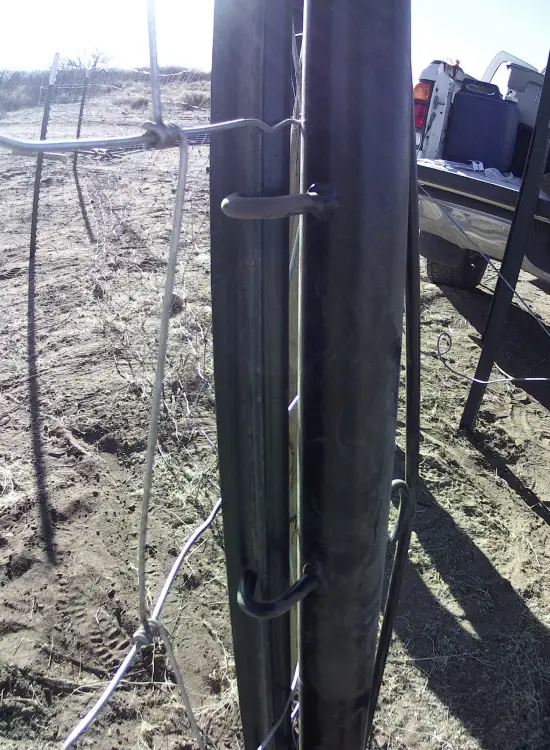
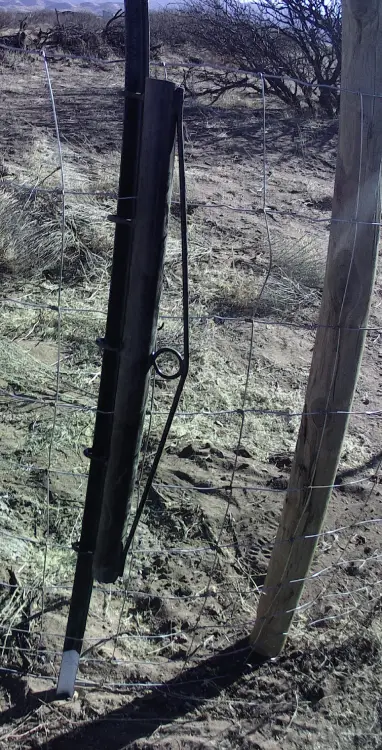
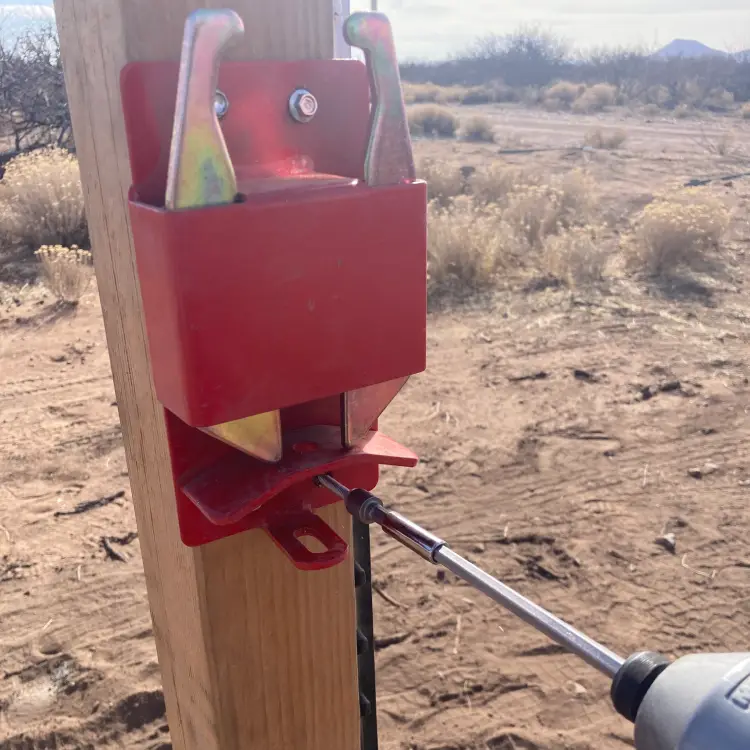
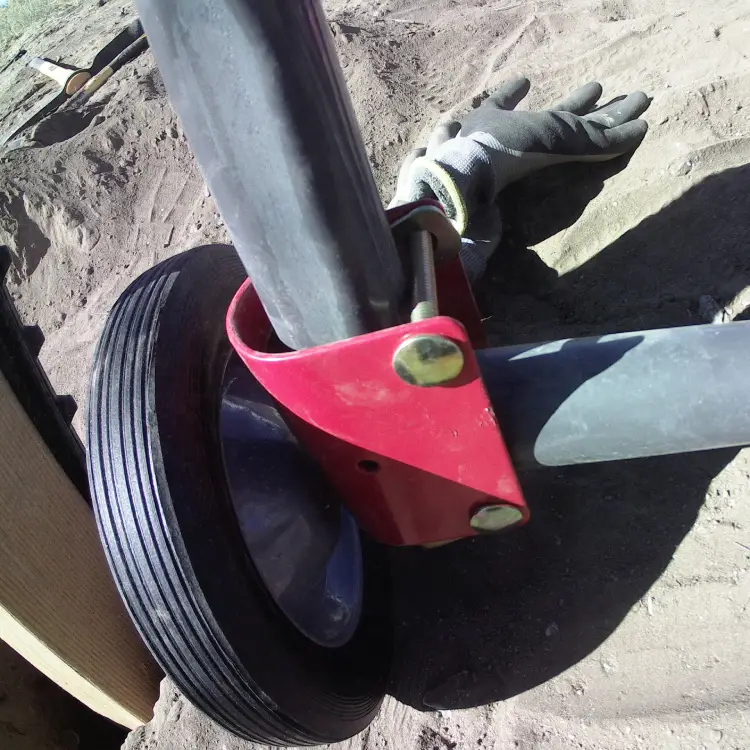
We have two places where we put up gates. At first we got 12 ft ones thinking that would suffice but it proved to be a bit tight for larger vehicles so we swapped one for a 16 footer instead. We were visiting some friends from church and noticed their neat gate latch. We decided to get the same one and also a wheel so that all the weight of the fence wouldn't just be on the pole. Also it makes opening and closing it much easier.
![Gate on ground before being hung Gate on ground before being hung]()
![Gate latch Gate latch]()
![Gate wheel Gate wheel]()
![Post to hold gate open Post to hold gate open]()
![Finished gate Finished gate]()
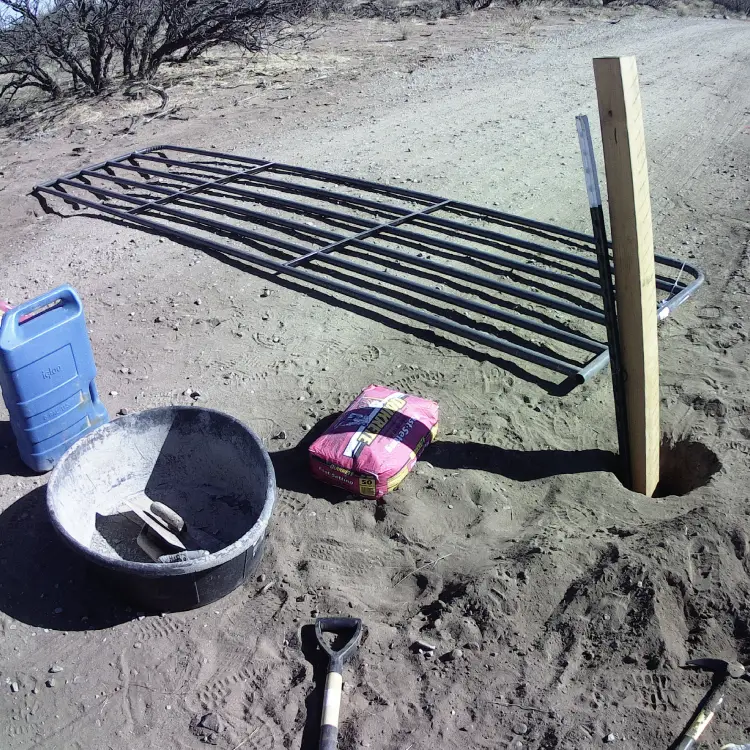
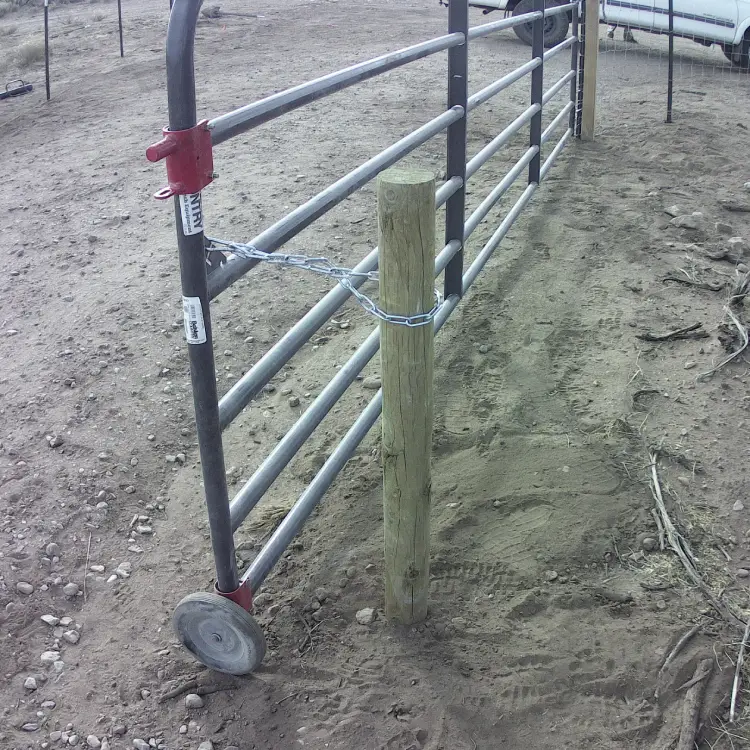

PRO TIP: Do not concrete the posts for the gate into the ground until you have measured it out with the gate present. Don't just go by the measurements of the gate itself. Digging up concreted posts isn't fun. Don't ask us how we know this.
Step #6: Get Dogs!
After getting the fencing all up, we got dogs! The OGDs, Off Grid Dogs! Meet Sir Tobias Esquire the Third (Toby) and La Madame Mizpah Extraordinaire (Missy). They've not escaped the fencing yet which is pretty awesome. They're outdoor dogs so they're generally on patrol at night, which is when the undesireable critters come out.
Since getting all the fencing up and getting the dogs, our wildlife issues have pretty near vanished. It seemed like the rabbits would hold conventions here at times but now we rarely see them. I don't believe the deer come around anymore and I haven't seen a skunk in ages. This is all wonderful. Now we can garden again in relative peace although the dogs themselves have done their own demolition projects on various things at times lol.
![Toby Toby]()
![Missy Missy]()
Since getting all the fencing up and getting the dogs, our wildlife issues have pretty near vanished. It seemed like the rabbits would hold conventions here at times but now we rarely see them. I don't believe the deer come around anymore and I haven't seen a skunk in ages. This is all wonderful. Now we can garden again in relative peace although the dogs themselves have done their own demolition projects on various things at times lol.

Sir Tobias Esquire III (Toby)

La Madame Mizpah Extraordinaire (Missy)
The conclusion of the whole matter
This project was one of our biggest yet. It was indeed a lot of work but rewarding in so many ways. We've never done anything of this scale before and to be able to see the fruit of our labor is very gratifying. Don't let anyone convince you that you can't do something until you've at least tried. God has given us the ability to learn new things so don't be afraid to attempt the unknown. I gave Meena a t-shirt that says 'Do Hard Things'. Let that be your motto. There will surely be mistakes made along the way, but that's a part of the learning process. Just be safe and cautious with anything you undertake. Especially if it involves power-tools :-)
Happy Building!!!!
![Finished fencing Finished fencing]()
Happy Building!!!!
